")
8 Tips to Achieve a Salon Quality Silk Press at Home (Without Permanently Damaging Your Curl Pattern)
Posted by Sholanda Armstrong on Nov 22nd 2019
There’s one style that most naturalistas itch for at some point in their hair journey – the silk press. Whether it be for a #lengthcheck, seasonal trim, or to remind the haters that you’ve got hangtime, the silk press slay finds itself on many naturalista’s must-do list.
Question is, can it be done without damage?
To safely silk press and get salon results at home without heat damage, we’re sharing the expertise of DE Educator and veteran stylist Aaron Tracey.
With over 20 years of industry experience and a client roster that’s over 80% natural, it’s safe to say that Tracey knows a thing or two about slaying a silk press.
Warning – this ain’t your mama’s press n’ curl!
8 Tips to Slay Your Silk Press at Home
1- Be prepared to shampoo at least twice.
For ladies with natural hair, Tracey recommends always starting with a clarifying shampoo . This gets rid of the oil, dirt, debris, and product buildup that can cause heat damage. After clarifying, use a moisturizing shampoo like DE’s new Agave & Lavender Moisturizing Hair Bath to restore moisture levels in the hair.
Tracey Pro Tip: If you’ve been heavy-handed with the oils and butters, use a clarifying shampoo twice for good measure. Follow up with a moisturizing, sulfate-free shampoo to restore moisture to the hair.
2- Don’t skimp out on deep conditioning.
Moisture is critical to the success of the silk press for two reasons. One, having hair that is properly moisturized via shampooing and deep conditioning helps prevent reversion and swelling of the hair in the days following the silk press. Two, moisture is one of the best ways to prevent heat damage. Hair that lacks internal moisture is more susceptible to damage and breakage – and a deep conditioner that moisturizes, smooths, and strengthens the hair is one of your best defenses - like our Agave & Lavender Moisturizing & Detangling Conditioner.
3- Heat protection is a must!
Use additional heat protection to preserve the integrity and health of your natural hair while silk pressing. Tracey recommends the DE Agave & Lavender Blow-Dry & Styling Primer as a lightweight moisturizer and heat protection across all textures.

4- Keep it thorough – your blow drying, that is.
As it turns out, the secret to a fly silk press is a bangin’ blowout. When the hair is blown dry to maximum straightness, less passes of the flat iron are required to finish the job.
Tracey recommends blow drying with the concentrator nozzle and a brush – NOT the comb attachment. Use a paddle, round, or Denman brush, and marry it to the concentrator nozzle, moving in tandem from root to end.


Tracey’s Pro Tip:
If your blowouts have frizzy, puffy ends, use the marrying method, and don’t stop moving the brush and concentrator down your hair until it literally falls off the brush. This way, you’re getting it smooth and straight to the very end.
5- Small sections make all the difference.
And if you really want that fresh silky bounce? Be prepared to put in the work. The best blowouts happen in small sections. Tracey suggests parting the hair in 4 sections, and within each section, taking 1 inch partings to blow dry. It’ll take a long time (and a lot of upper body strength) – but the results in the end are well worth it.


6- Heat your flat iron accordingly...
How high can you crank up the flat iron without risking heat damage? As it turns out, there’s no cut and dry answer. Tracey typically silk presses his clients at 400 degrees Fahrenheit, while opting for up to 450 degrees on his clients with coarser textures.
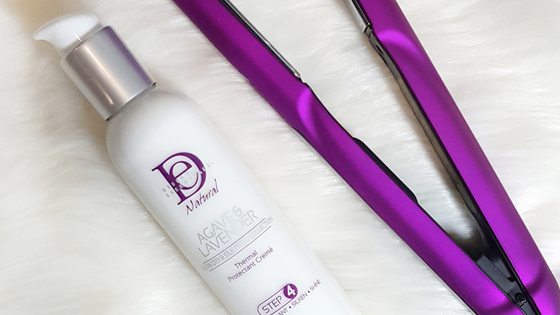
If those numbers made you shudder a bit inside, don’t worry. Tracey maintains that if you’re making a conscious effort to properly cleanse and deep condition, then it really is possible to straighten at those temperatures and not experience heat damage. The Agave & Lavender Thermal Protectant Serum adds another layer of heat damage prevention insurance.
Remember to part and work in small sections. The sections that you flat iron should be thin enough that the plates of the flat iron touch both sides of the hair equally – distributing even heat all around. And don’t forget to start as close to the root as possible!

Tracey’s Pro Tip: Less passes of the iron are always better. If you plan to rock curls (loose or tighter) in your silk wrap, curl the hair with your flat iron as you straighten. The curls will last longer, and you’ve avoided an extra pass with your iron.
7- A trim will change everything. Seriously.
In his salon, Tracey encounters a number of natural clients who insist on not having their hair cut or trimmed – which he understands. However, what separates a silk press from its hot comb predecessor is movement and body – something that can only happen with healthy ends.
For a flawless finish, Tracey recommends a proper cut or trim. It’s the final step in getting the hair to fall and move like you see in those #silkpress videos on Instagram.
For more information about DE Educator and Stylist Aaron Tracey, visit www.irochair.com. To check out his work, follow him on Instagram at @iroc_hair.
Don’t forget to tag us in your silk press results on Instagram! Tag @designessentials and use the hashtag #designessentials so Team DE can see your tresses!
Shop the new Design Essentials Natural Agave & Lavender Collection online at DesignEssentials.com and at your local Sally Beauty!