Nude & Natural Spring Makeup Look

All Makeup Products Used For Step-by-Step Tutorial
Get The Look – Step 1:

Start with a clean, moisturized face.
Get The Look – Step 2:

Evenly apply makeup primer.
Get The Look – Step 3:

Use a foundation brush to evenly distribute BB Cream.
Get The Look – Step 4:
Outline brows using Anastasia Beverly Hills Perfect Brow Pencil to your desired shape. With light, soft strokes fill in brows as needed.

Naturally blended eyebrows.
Get The Look – Step 5:
Before applying eye shadow, use your fingertip to prime both eyelids with Urban Decay Pore Perfecting Complexion Primer Potion. Using a eye defining brush, choose your favorite shades from the Maybelline NewYork The Nudes Pallete. For this look, 4 different nude shades were used on the entire eye area, lid, contour crease, and line around the eye to create a very natural look. Last, evenly blend shadows together with Urban Decay Good Karma Optical Blurring Brush.
Get The Look – Step 6:
Apply two even coats of Maybelline NewYork Lash Sensational Washable Mascara to both your top and bottom lashes (letting the first coat dry before applying the second).
Get The Look – Step 7:
Line bottom and top eyelids using Urban Decay 24/7 Glide-On Eye Pencil. For a more dramatic look, on top eyelids create a wing-effect or cat-eye-effect (as pictured below).

Eyes completed with eye shadow, mascara, and eyeliner.
Get The Look – Step 8:
Highlight & Contour face as desired. Start by applying MAYBELLINE NewYork Dream Lumi Touch Highlighting Concealer and MAYBELLINE NewYork Fit Me Concealer underneath both eyes, on the bridge of the nose, forehead, underneath nose, and around any dark areas surrounding the lips.
Get The Look – Step 9:
Using a contouring makeup brush, choose an eye shadow shade darker than your skin tone from The Nudes Palette, on both sides of your face create a line from your temple to cheek bone, pucker in your cheeks and then create another line from your cheek bone to the outer corner of your lips. Last, create a line from your cheek bone to your jawline.

Example of contour and highlight placement.
Get The Look – Step 10:
Evenly blend out all contour and highlighting lines using a contour makeup brush and/or a makeup blending sponge. For this tutorial I used Tarte Slenderizer Bamboo Contouring Brush.

Blending with Tarte’s Slenderizer Bamboo Contouring Brush

Finish look after contouring and highlighting.
Get The Look – Step 11:
Apply HOURGLASS Ambient Lighting Powder along cheeks in a circular motion and everywhere you applied concealer in Step 8 to create an illuminating glow. Also apply to the area in between your cheeks and jawline.

Apply bronzer to cheeks in a circular motion.
Get The Look – Step 12:

Pucker up!
Get The Look – Step 13:
Finish off your natural look by sweeping bareMinerals Brightening Pearl Mineral Veil across your face with a bronzer brush for an added glow and to set your makeup.

Completed Nude & Natural Makeup Look!
Get The Look – Step 14:
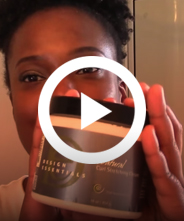
Bring together entire look with a fierce haircut and color! For this look I used a 1 1/2 inch flat-iron to curl sections of hair on top of this disconnected mohawk cut, finished with Design Essentials Form Professional Holding Spray and Diamonds Oil Sheen Spray for shine!

Hair curled and finished using Design Essentials.

Side view of tapered hair cut.